
Adding images in WordPress
How to add single images to posts and pages (not galleries)

1. Prepare the image and log into WordPress
Ensure that you know the filename and location of the image to be added in advance.
Your image should be a JPG, GIF or PNG type file. Any other format is likely to be inappropriate for web use and will need to be converted beforehand (usually with image editing software).
2. Add an Image block
First, edit the page or post where the new image is required.
There are several ways to add an image block to your post or page. If you are not familiar with all the different ways of adding a new block, read the Adding Blocks guide at WordPress.org.

Don’t worry if the new image block doesn’t appear precisely where you want it. You’ll be able to move your new block up and down within the content after adding. Read the Moving Blocks guide at WordPress.org.
3. Upload an image file or pick one from your media library
Select Upload if adding a new image or Media Library to select an image which you’ve uploaded previously.

Changing the image settings
With your image block selected, look for the Block Settings sidebar, shown on the right for more options about how your image block is displayed. If you can’t see this, click the Settings button (looks like a cog) in the top right and ensure you’re viewing the Block settings, rather than the Page settings.
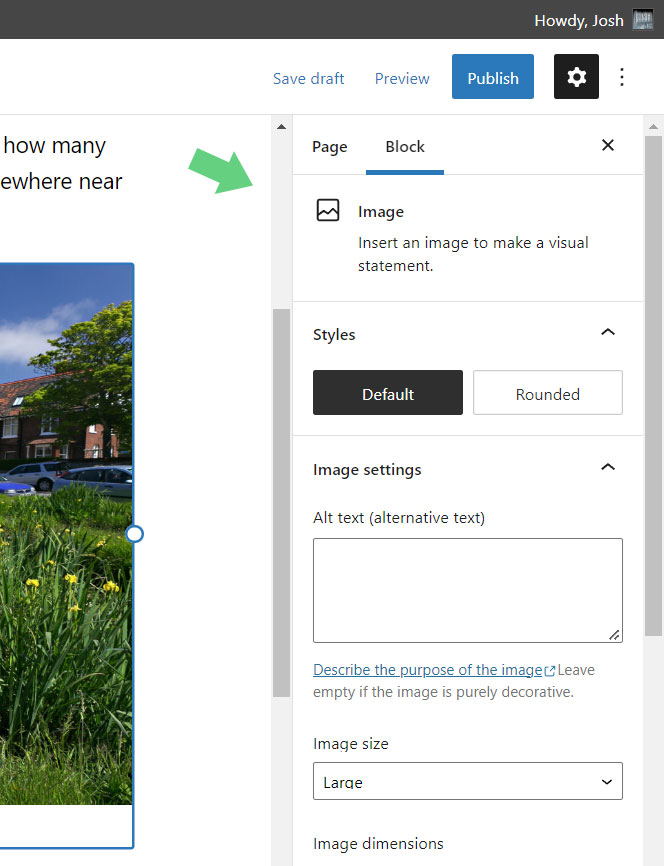
Here you can ensure your image has the correct Alt text (alternative text) set, to assist visitors to your page with visual impairments. You can also choose which size of image is used (e.g. thumbnail, medium, large or full size), add a border and other options.
Setting an image link
If you wish your image to link to another page in your website or another page outside of your website, select the image and use the Insert link button which appears on the block’s toolbar above the block this (looks like a chain link).
Remember to set the link to Open in new tab if appropriate. This is recommended for links to pages outside your website and links to PDF documents.
Pre-processing your images for insertion
(preparing images in advance)
Images can (and arguably should) be prepared prior to insertion using software such as Adobe Photoshop Elements or similar. This gives you the added benefit of being able to adjust other qualities such as brightness, contrast, colours. And sometimes, cropping the image can be very useful.
All of these tasks should be carried out in advance, prior to inserting your image into your WordPress powered website (in your favourite image editing software).
Some basic image editing options are built into WordPress (e.g. for cropping, rotating and flipping images). Go to your Media Library, select the image you wish to edit and then use the ‘Edit Image’ button underneath the image.
The Media Library
All the images uploaded to your website can be viewed and edited in the Media Library. Click Media in the left hand navigation menu of the dashboard to view them.
Imsanity! Compress your images to a sensible size
TIP: We recommend the use of image compression plug-ins such as Imsanity. This will automatically resize your image to a sensible size. This is especially important if inserting images which have come directly from a camera. This will save valuable disk space on your hosting server.